Out of all the home improvement projects the ones we dread the most are those involving electrical work. It could be something as simple as switching out a light fixture- working with electricity always give us hesitation and makes us a bit nervous.
It’s because of that fact that when we needed to have a new CGFI outlet installed in the kitchen we got an electrician to do it. The electrician came when the kids were taking a nap. We arranged this time so that I could watch what he was doing, in addition to the fact that the power to the TV had to be disconnected.
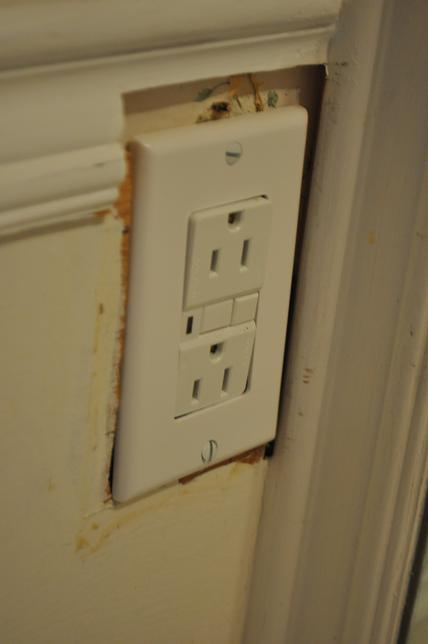
It took the electrician 5 minutes to install the CGFI outlet. In asking him numerous questions about what he was doing I felt secure enough in replacing the rest of them myself. This was a big step for me. In my earlier electrical work with the house I used to turn off ALL the power to the house, instead of just the outlets or area that I was working.
A testament to this is the fact that the first outlet I replaced took me 25 minutes. The second time I installed a GFCI outlet it took 20 minutes and each time afterwards it got shorter and easier. Even if I installed one GFCI outlet while the kids were sleeping it was an effective and timely use of our Naptime DIY.
The directions that came with the outlets were simple and all we needed to get the job done.
- Turn power OFF at the power box.
- Unscrew the old outlet from the wall.
- Confirm that the power is off with a GFCI tester.
- Unscrew/unplug the wires.
- Plug them into the appropriate hole in the back of the GFCI outlet.
- Screw the ground wire onto the new outlet.
- Screw the new outlet back into the wall.
- Turn the power back on at the power box.
- TEST your work.
The best video we saw online was this one. It’s simple, direct and helped walk us through exactly what to do.
On one outlet things didn’t go as expected. I installed the GFCI outlet and it didn’t behave like the others. The test button remained out and wouldn’t reset. What was more troubling was the fact that I smelled something burning or smoke-like. I immediately turned off the power at the source and double checked my work.
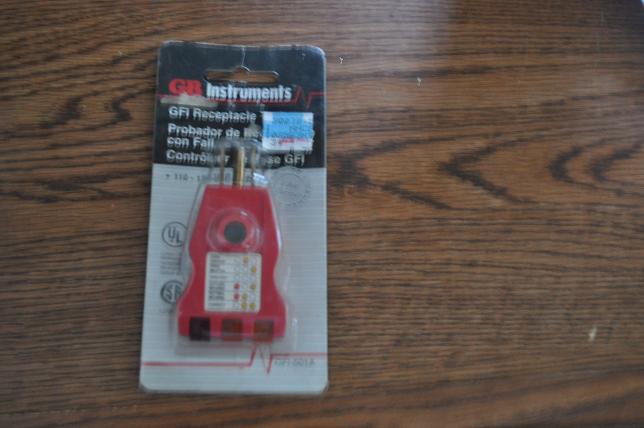
 A neighbor of ours leant us a GFCI tester. The GFCI tester is plugged into the new CFCI outlet and will light up according to what the problem is. In our case the GFCI tester said “Open Hot”, neither of which sounded good. However, in doing some research online an indication of a faulty outlet is when it says “Open Hot” on your GFCI tester.
We exchanged the faulty GFCI outlet for a new one and the correct installation of the GFCI outlet was without incident. The GFCI tester said that everything was correct and we went on to change the rest of the outlets in the house.
If you need to install a GFCI outlet it’s an easy task. Having said that, if you have any doubts or hesitation about doing the job, just call a certified electrician.
As a stay at home dad I miss having the spare time to fix things. Even though the children are my full time job, things still break or need a fix in the house. Sometimes the repair will be something that I can easily complete and other times it’s a repair that I simply should’ve paid to have it done. Regardless, I’ll write it up here in hopes that you may be able to gauge what you can do and when you need to call in for help. The series is called, Naptime DIY because the tasks are hopefully accomplished in 60 minutes, which is a good naptime period.


 Facebook
 Twitter
 Flickr
 GooglePlus
 Youtube
As a former electrician, there are a few other concerns I would have about replacing/installing a GFCI outlet on your own. First of all, GFCI outlets have the capability of “passing on” their GFCI protection to other “normal” outlets. You may see this in your kitchen, for example. One or two GFCI outlets will protect the rest of the normal outlets around your sink and counter top for small appliances. Knowing this, you should consider:
If you are installing GFCI outlets in a new area, you don’t need a GFCI at every outlet. One GFCI is capable of protecting several normal receptacles. So, install your GFCI where your FEED enters the room, and then use regular receptacles for the rest of the room (assuming you are feeding with just one circuit).
If you are replacing an old GFCI, it is important to wire it the same way it came out so that you don’t lose GFCI protection on your normal outlets (this was covered in the video when he talked about “line” and “load” but he didn’t really say why they were set up this way).
If, for whatever reason, you don’t want to protect the outlets down the line, but you still want to have GFCI protection on one outlet in the line, simply place both “in” and “out” wires under the LINE side terminals, and ONLY that outlet will be protected.
If you are unsure about anything, call a licensed electrician. Electricity can be lethal, even at household voltages (seriously, I know someone who died changing a light bulb), so always be sure that the power is completely off and that you know what you’re doing. Okay, now I feel better.
You are correct. The electrician we hired to do the one told us all of that. It did take us some time to figure out the ‘line’ and ‘load’, once we did that it made things much easier.
Side question: do you know anything about 3-way light switches? We’re replacing them and it’s like a Rubik’s Cube puzzle. Turn one a way and the others stop working….grrrr….we can DM or email you some questions if you have a second…
No problem. Sent you a DM on Twitter with my phone number to walk you through it.