When my wife and I moved into our house it came with an extensive outdoor lighting set up. In the front yard alone there are 20 lights. In the back yard there are about 20 more, all of the lights are metal and the entire system runs on three transformers. We live on a normal sized lot, mind you, it’s just a very well lit lot.
My wife grew up with outdoor lighting. She loves things well lit, unless it’s an overhead light, which she’s all but eradicated from the inside of the house. It’s possible, although somewhat unlikely, that she included quality and expansiveness of outdoor lighting into her checklist when we were house shopping.
Through the years the biggest problems that we had was a light bulb that burned out. However, we’ve recently experienced our first major problem with the outdoor lighting system.
The Problem
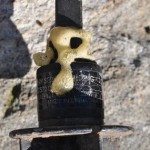
It started with an outdoor light whose stem had broken off at the ground. The light was flickering on and off and I thought that was attributed to a faulty connection with the alligator clips. The alligator clips are those two pronged clips that go from the fixture to the main low voltage wire.

The stem was fixed by putting a line of Gorilla Glue along the three sides of the stake that support the fixture. Don’t use too much Gorilla Glue because it expands greatly once it dries.
The strong fixture and new wire were attached to the main low voltage wire again, but it wasn’t working. I then looked at the light fixture that was ahead of this one and it wasn’t working either. The second light fixture was dug up and all of the wires were secure.
The Other Problem

With the only two light fixtures in the front not working I knew that it had to be a problem in the main low voltage electrical line. Through lots of digging, the main low voltage electrical line was dug up. Now that the line was exposed the trick to finding out where the short was could begin.
Before and after each light fixture or splice the test light was put into the line. This process was long and arduous, if there is a better way to find a bad connection I would love to hear it.
Voila!!!


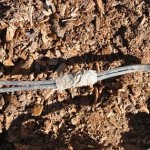
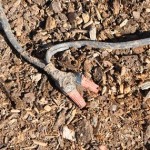
The root cause to both lights not working was a sloppy splice. When you splice outdoor low voltage wires it should be wire to wire, secured with an electrical nut and then wrapped with electrical tape.
Overall most of our wires were connected that way. However, there were a couple connections that were simply cut and twisted into the wire. The shorts from both lights were caused by one specific splice that was done incorrectly.
Hints
- Prior to using electrical nuts twist the wires in a clock wise direction. That way the nut will make their connection stronger, instead of weaker.
- When placing the low voltage lines back into the ground try to remember where they are. That way when you plant something next spring you won’t be digging up the line again.
- Be certain that the wire is under any fences or other objects before burying it again.
- Be patient. Digging up the lines and testing each area can be a frustrating, maddening job.
- Use a shovel and a Maddox, they’ll each have a role in clearing the dirt to uncover the lines.
The Bottom Line
Overall this was a fun project. It did take several hours to diagnose and complete though. It was fun because it was dirty, somewhat relaxing and educational. This is a DIY project that most anybody, with a modest degree of patience, can complete. If you’ll be digging around any electricity I recommend calling 811 to have the power company come out and mark the lines.
As a stay at home dad I miss having the spare time to fix things. Even though the child is my full time job, things still break or need a fix in the house. Sometimes the repair will be something that I can easily complete and other times it’s a repair that I simply should’ve paid to have it done. Regardless, I’ll write it up here in hopes that you may be able to gauge what you can do and when you need to call in for help. The series is called, DIY a Stay at Home Dad Can Do, but in some cases, you shouldn’t, because of difficulty, time involved or money. All dads aren’t equal. In this case the task is very easy and you can do with little effort, but lots of patience.


 Facebook
 Twitter
 Flickr
 GooglePlus
 Youtube